Many moons ago, when I was still rocking a 35mm camera, I tended to have a ton of physical photos kicking around. After a lot of years of collecting frames for all my photos, I had ended up with a pretty decent stockpile of neat frames. So I had an idea of creating a cool wall collage with the nicest of the ones I had collected.
The only problem: they were all different colors that didn't really go well together. Solution: painting time!!
Conveniently, I had some paint left over from the table refurbish project, so I simply used that to repaint the frames I had.
Once I had the frames finished, I arranged them in about a dozen ways to try to figure out what worked with what I had and came up with this layout.
Once I had the frame configuration figured out, it took me a while to decide what I wanted to do with what would go inside them. Finally, I decided to fill each frame with pieces of cloth from my quilt project.
Then began the task of getting this bad boy up on the wall. I didn't take photos of how I did this part (mostly because there was a giant mess during the process and I like pretending like all my projects are well organized and always super clean haha).
Here's how I suggest doing this:
- Make a layout plan on the floor or a large table (mind spacing and sizes and designs as much as possible)
- Turn over each frame and place a strip of parchment paper or news papers over the backs of the frames.
- Feeling through the paper, mark where each frame will be hung.
- Using a laser level, make sure the markers are level and tape your paper to the wall where the frames will go.
- Drill small holes through the paper into your wall to prepare for slightly larger nails (if you have heavy frames, you may want to use screws instead of nails)
- Hammer in your nails and pull off the paper from the wall
- Hang your frames
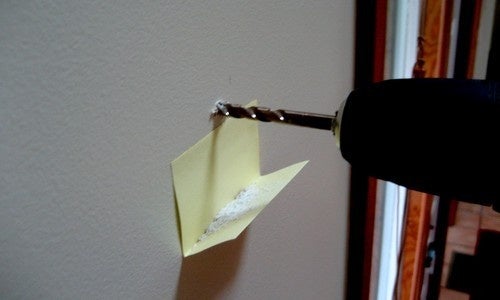
 Protip: when drilling holes in walls (especially if you have plaster walls like I do), to avoid the mess, stick folded post-it notes to the wall under the place where you're going to drill your hole so that it catches all the wall mess. I learned this trick a few years ago and have been using it ever since!
Here's how mine turned out!


